
Perfect Pizza Crust
The perfect pizza crust is as easy as some flour, yeast, water, salt, and oil. Afraid of giving it a try? Don’t be! Follow my easy steps for pizza success and then make plenty of extras to freeze for busy days ahead.
I think I’ve made a pizza on just about every crust you can imagine. If you are about my age (25) (35) do you remember when Boboli crusts hit the market? Of course they’re still around and I still love them, and maybe I was totally deprived as a child, (not) but I thought I was flying high when mom would buy us a pack of those and make us a little pizza.
This is coming from the kid whose mother refused to buy Capri Sun or Fruit Roll Ups because she said they were to expensive. I remember the day my older brother called after he had moved out on his own. I answered the phone and he said “Do you know Capri Suns are $1.39 for TWELVE?!” He practically yelled at me. That’s what they cost at the time.
Astounded, we happily confronted mom and we still don’t let her live it down to this day. “I guess I thought you didn’t need that,” is her defense. Fair enough mom. Thank you for the permanent emotional scars. (P.S. my mom is AWESOME!)
So, I’m not entirely sure how we are going to transition that into a pizza crust. Oh yeah–the Boboli. I remember now. I’ve made crusts on french bread, I’ve bought frozen dough (one of my favorites!), the package that you just add water to, and premade crusts that are as dry as a brick. They all work okay.
But making your own is still pretty great. I had tried a couple of different doughs and they really are easy to make, you can freeze them for later, and make some pretty great creations from it. Calzones (aka pizza pockets around here), a dessert pizza would be nice, or personal sizes everyone can load themselves. It’s a family bonding thing.
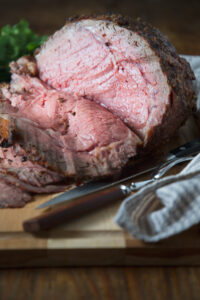
If you have a pizza stone, heat that baby up really hot. I have a stone but I mostly use it to catch spills in my oven. The day I made this pizza I got a bright idea to use it. So I heated it up–really hot.
But once my dough was ready to be topped I was stuck. How was I going to get it onto that screaming hot stone? I don’t own a pizza peel. Now I admit this wasn’t my brightest moment as I pulled that screaming hot stone from my 500 degree oven and attempted to place my dough on it. In my mind, I was going to stretch it to size and top it then put it back in the oven.
Fail.
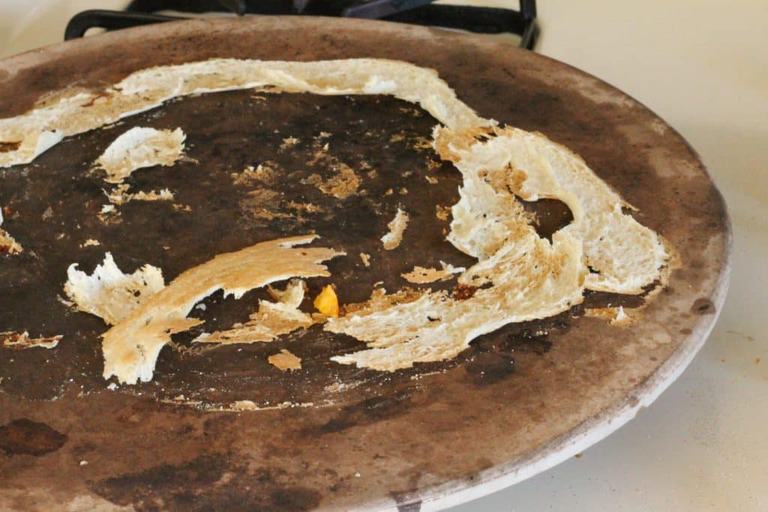 Immediately the crust seared in a lump to the stone. Frustrated I peeled it off, reworked it and put it on a regular old pizza pan. It’s still crispy, a little chewy and really good. Even when you nearly ruin it. See? If I can come back from this, you can make it work.
I believe in you.
Perfect Pizza Crust
Ingredients
- 1 package active dry yeast
- 1 cup warm water
- pinch of sugar
- 1/2 teaspoon salt
- 1 1/2 tablespoons extra virgin olive oil plus more for coating bowl
- 2 1/2 cups to 3 all purpose flour
Instructions
- In a large bowl add the water, yeast and sugar and mix well.
- Add the salt, olive oil and 1 1/4 cups flour and mix well. Add one more cup of flour, reserving 1/4 cup for kneading.
- The dough will be slightly sticky at this point.
- Transfer the dough to a lightly floured surface and knead 5 to 7 minutes adding enough flour to form a smooth, elastic dough. All stickiness should be gone.
- Transfer dough to a large oiled bowl and turn to coat on all sides. Cover with plastic wrap and allow to rise in a warm place about one hour.
- Preheat oven to 500 degrees.
- Place your pizza stone in the bottom of your oven to preheat if you're using one. If not, stretch your dough to fit your chosen pizza pan. If it springs back, let the dough rest 5 minutes before stretching it again.
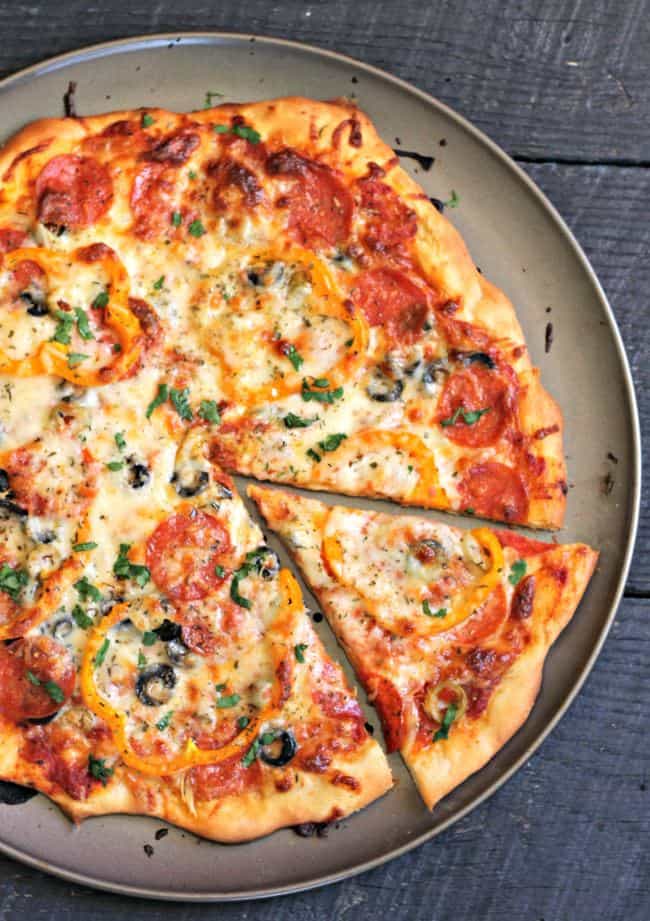
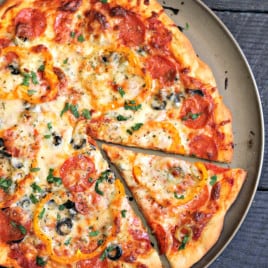
- Top with your favorite toppings and bake 12-15 minutes until golden and crispy.
- Estimated Weight Watchers Points Plus per 1/6th of the pizza: 5 points


This pizza dough was the easiest nd tastiest recipe! I love pizza and I’m grateful to have found yours. Thank you! I it my dough in half after proofing, stretched it out on parchment paper and added the toppings. Used a pizza peel to put it on my stones. Delish!!
Is “it tastes yummy” an acceptable review? This was thin and chewy and crisp, and yummy! Easy to do, and well worth the effort,
Yes Colleen that’s absolutely an acceptable comment. ☺️ I’m so glad you enjoyed it!
I’ve tried lots of different crust and this is one of the best ones I’ve found. Don’t like the wait time, but crust was good, not to heavy or thick and doughy.
Ah there’s always something good to come when you have to wait a little bit JD 😉 Glad you liked it. –Rachel
What are the directions to freeze the dough?
Jessica when I freeze this, I mix the dough and wrap it tightly in plastic wrap then put it in a freezer bag. It will rise a bit before it freezes so be prepared for that. Frozen dough will last 2 to 4 months in the freezer well wrapped. To thaw, I just unwrap it, put it in a bowl and cover it in greased plastic wrap to thaw and rise when I need it–that may take 3 or so hours. –Rachel
Can i double this recipe?
Yes! Double, triple, quadruple!
This crust was very light with lots of bubbles during the rise. That being said I am imparting a few technique tips and comments. First, this recipe start to eaten took 2 hours. Only making the crust took 85 minutes. Putting the pizza together and baking took the extra 35 minutes. The crust patted out very nicely. I patted out the crust on corn meal spread over a piece of parchment paper. The cornmeal makes for a crisp bottom and the parchment paper makes it easy to put on the pizza stone. As you can see in the photo the bottom is crusty. I also reduced the temperature to 425 degrees and baked for about 15 minutes to achieve browned cheese on top.
The pizza looks great!
I’ve been there too, finished all the toppings and found I cannot transfer the soft dough into the oven…
One solution my friend taught me, you could place the pizza dough on aluminum foil and finish topping. It’s easier to slide the pizza with aluminum foil on the bottom (still require a pizza peel though…), and you could pull the foil away during the middle of baking, so the pizza crust can touch the pizza stone.
Thanks for the tip Maggie. Next time I’ll know better. I’m such a nut!
@Maggie, One of the things we do to make the pizza slide of better is place some corn meal on the paddle and on the pan/cast iron/stone and it slides right off. =)
This pizza looks awesome! I always make pizza crust myself…well, sort of… I make it in a bread maker. I guess, this would be considered cheating 🙂
Thanks Maria! That’s not cheating..
just however you get it done work for me!
Funny post! I used to always want store bought cookies, ’cause all we ever had was homemade…oh poor me!
Kathi
p.s. I need a pizza peel too!
I love this story Rachel! I’ve been there and finally gave up on my pizza stone. Glad to see your pizza still turned out beautiful! Have you ever tried to make pizza on the grill? I love having a few frozen pizza dough’s on hand.